
How to Steal Eggs in +1 Wings For Eggs: Rare Egg Routes
Learn how to steal eggs in +1 Wings For Eggs without falling in lava: stamina budgeting for the flight home, carry limits, rare nests and a repeatable route.
FAQ
How do you steal an egg in +1 Wings For Eggs?
Why do I keep dropping the egg before I reach my base?
How many eggs can you carry at once?
Do you lose your eggs when you die?
Which nest has the best egg in +1 Wings For Eggs?
Do you lose your pets when you rebirth?
Stealing eggs is the only way to earn real money in +1 Wings For Eggs. Everything else — wings, upgrades, rebirths — is paid for by the animals you hatch from stolen eggs, so a clean steal run is the core skill the whole game is built around.
The problem is that most players treat the steal as one long flight. It is not. It is a there-and-back trip where the return leg is the dangerous half, and the players who lose eggs are the ones who spend their whole stamina bar reaching a nest.
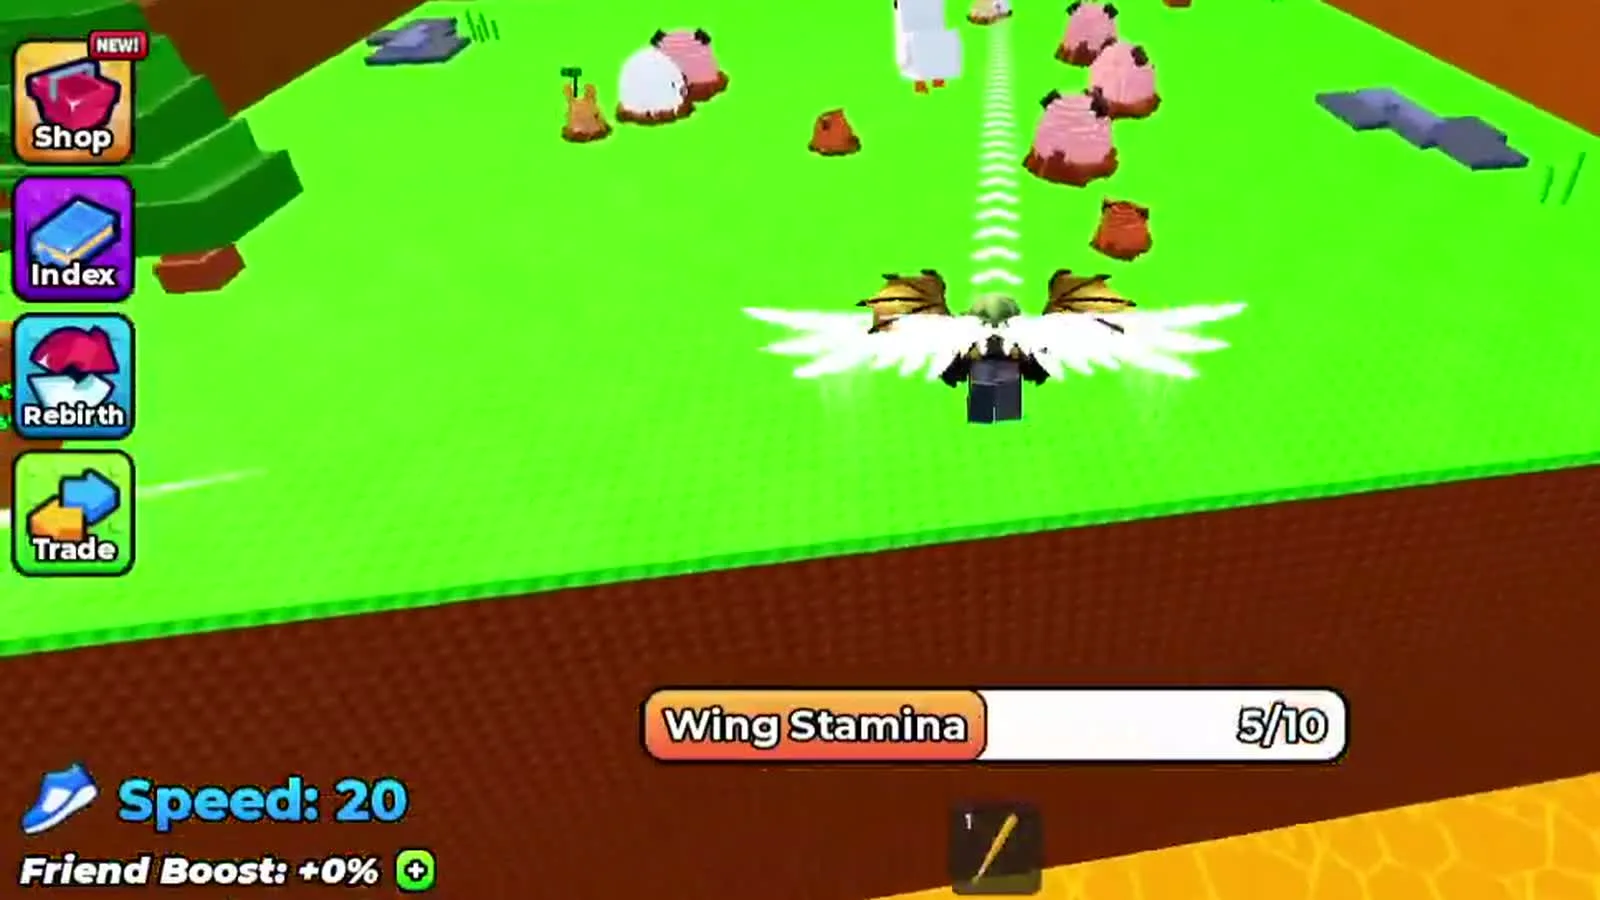 The return leg is the dangerous half, so the outbound flight should never eat the whole bar.
The Steal Loop: Nest to Pen in Four Steps
Every successful steal follows the same four beats, whether you are farming the first island or chasing a Deep Ocean egg:
- Reach a nest you can also leave. Pick an island inside your stamina range, land on its edge, and walk into the egg to pick it up.
- Keep enough stamina for the way home. The bar drains continuously in flight, so the outbound leg must not eat it all.
- Respect your carry limit. Your hands hold one egg until you buy capacity at the Upgrades stand.
- Place the egg on your plot immediately. Deposited eggs start a hatch timer and the animal inside begins earning offline.
Skipping step four is what ends most runs. If you are curious how the deposit feeds the rest of the economy, the beginner progression guide covers the full upgrade order, and the egg and zone reference lists which nest produces which animal.
Step 1: Land Without Touching the Lava
Lava is not a wall, it is a reset button. Touching it drops you back at the safe zone and costs you the egg in your hands, so the landing itself deserves more care than the flight.
- Approach from the high side. Glide down onto the island from above the nest rather than skimming the lava surface, where a late tap of the flight key puts you in the pit.
- Aim for the island edge, not the egg. Eggs sit in the middle of small platforms crowded with fences and defenders; landing short leaves room to walk in and turn around.
- Read the zone before you commit. Each zone asks for more wing stamina and resistance than the last, and flying into a zone you cannot handle is how you end up reviving mid-trip.
Do not confuse the two bars. Wing stamina is your flight time; the resistance stat is what keeps you alive when something hits you out there.
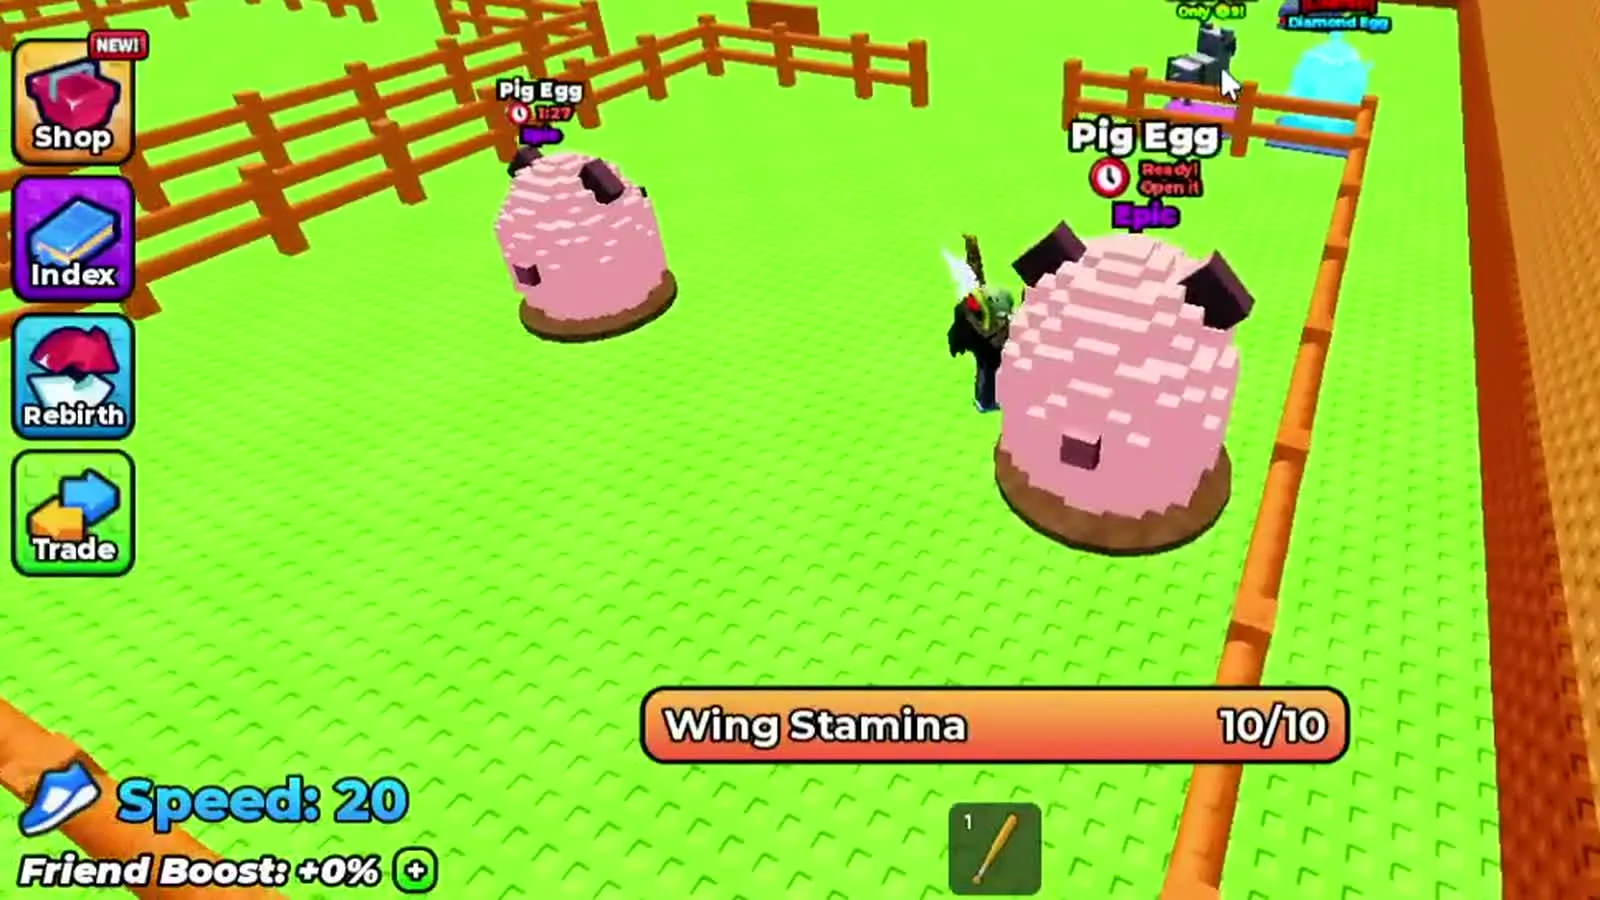 Topping the bar up before takeoff is free at the Upgrades stand.
Step 2: Budget Stamina for the Return Trip
The single most useful habit in this game is to treat the stamina bar as two halves: the outbound flight may spend one half, and the return flight needs the other. If you land on a nest with less than about half of the bar left, you already know the trip home will fail.
 Split the bar in half: one half out, one half home.
Stamina refills while you rest on solid ground, so a long route becomes a series of short hops. Floppys Pro demonstrates the technique during a Deep Ocean run: land on a mid-route platform and wait for the bar to come back before pushing to the next island rather than trying to cross everything in one glide (Floppys Pro, 9:04). 杰克游戏ROBLOX calls the same idea “flying in segments” when a nest is just out of range (杰克游戏ROBLOX, 5:03).
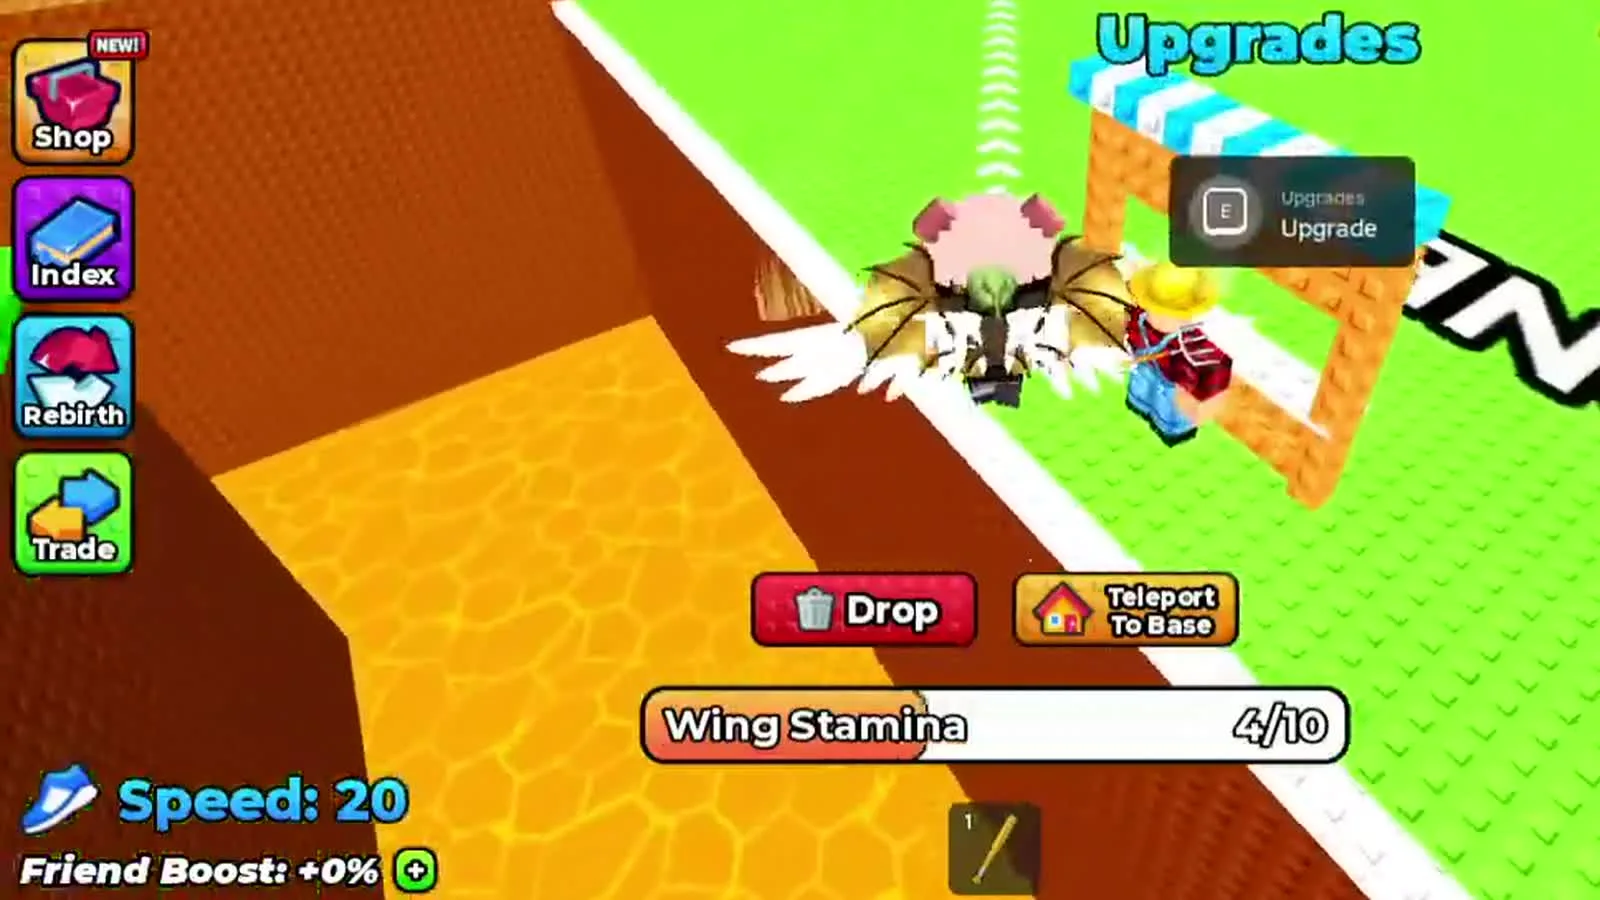 Four points of stamina is enough to land, but not enough to turn around again.
Wings do not make you fly faster — they multiply the size of the stamina bar, which is why a better pair of wings turns an impossible route into a comfortable one. The wings tier list and price chart breaks down every multiplier from Default Wings at 1.0x to Angelic Wings at 2.7x, and the wings shop in the safe zone shows the same multiplier on each card before you buy:
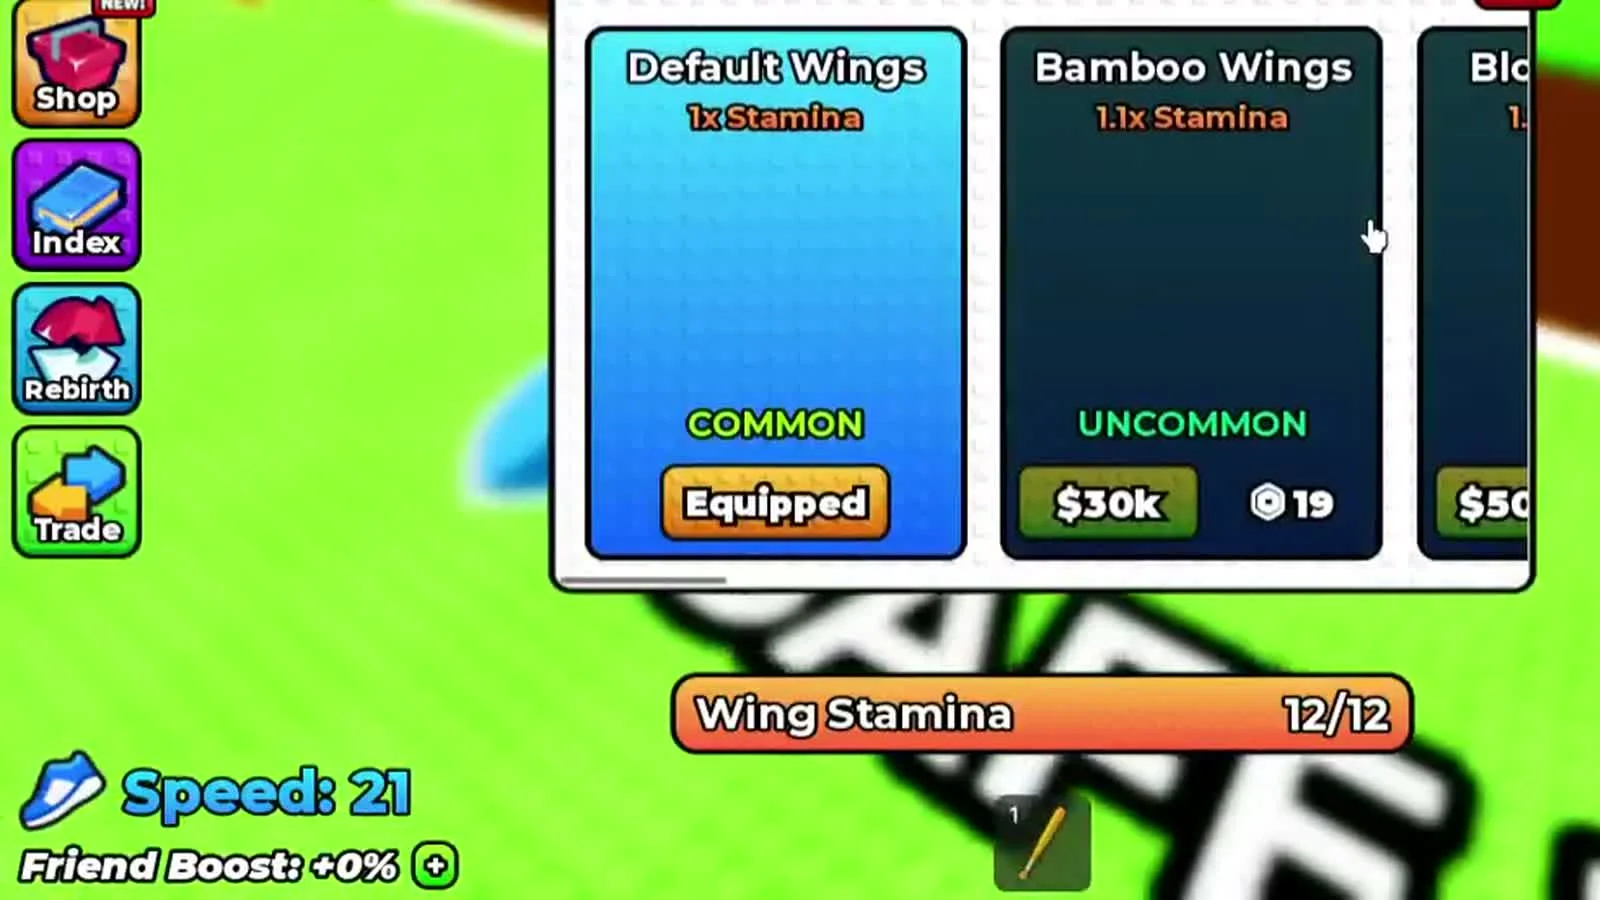 Wings never add speed; they raise the size of the bar, so the multiplier matters more than the price.
One caveat sits in the bottom of the HUD: next to the Drop button there is a Teleport To Base option. FoltynPlays uses it to bank a Deep Ocean egg without flying back at all (FoltynPlays, 7:47). Treat it as an emergency exit rather than a route, because the stamina you saved on the way home is still the stamina you need for the next takeoff.
Step 3: Carry One Egg Until You Upgrade Carry
Your hands hold a single egg at the start of the game, and the Upgrades stand in the safe zone sells the fix. The first carry upgrade costs $500,000 and raises capacity from 1 to 2. The same stand hands out the first +2 Stamina step (10 → 12) and the first +1 Speed step (20 → 21) for free, then charges $9,000 for the next Stamina step and $263 for the next Speed step (VendoPlus, 1:00).
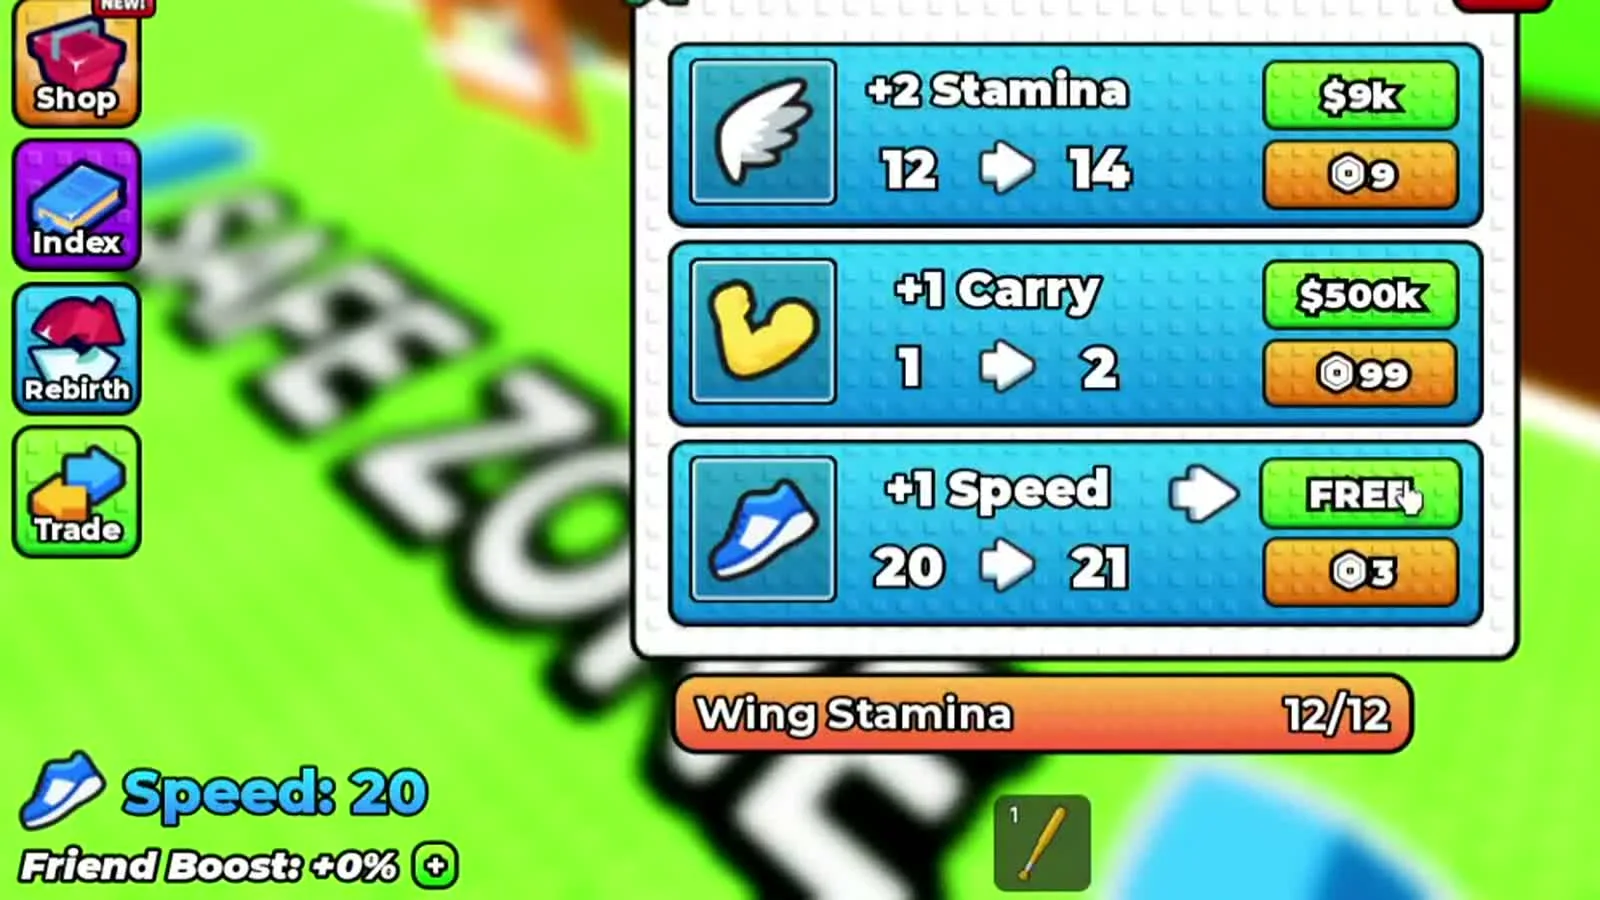 The first stamina and speed steps cost nothing, which is why the paid rows are the second step.
Two eggs are rarely worth it. CHALLS tested the limit directly and found that carrying a second egg makes you “a lot slower”, turning a comfortable return into a race against the bar (CHALLS, 4:34). When you are close to the limit the game warns you with a “hands full” message, and the second egg is the one you lose when something goes wrong. If you need cash for the carry upgrade, the cash farming guide covers the income side.
Step 4: Bank the Egg Before You Get Greedy
Depositing the egg is the point of the trip. Place it anywhere on your plot, and the growing-egg panel starts a hatch timer — most early eggs finish in about a minute, while high-rarity eggs can take hours. From that moment the animal is yours and starts producing cash per second, including while you are offline.
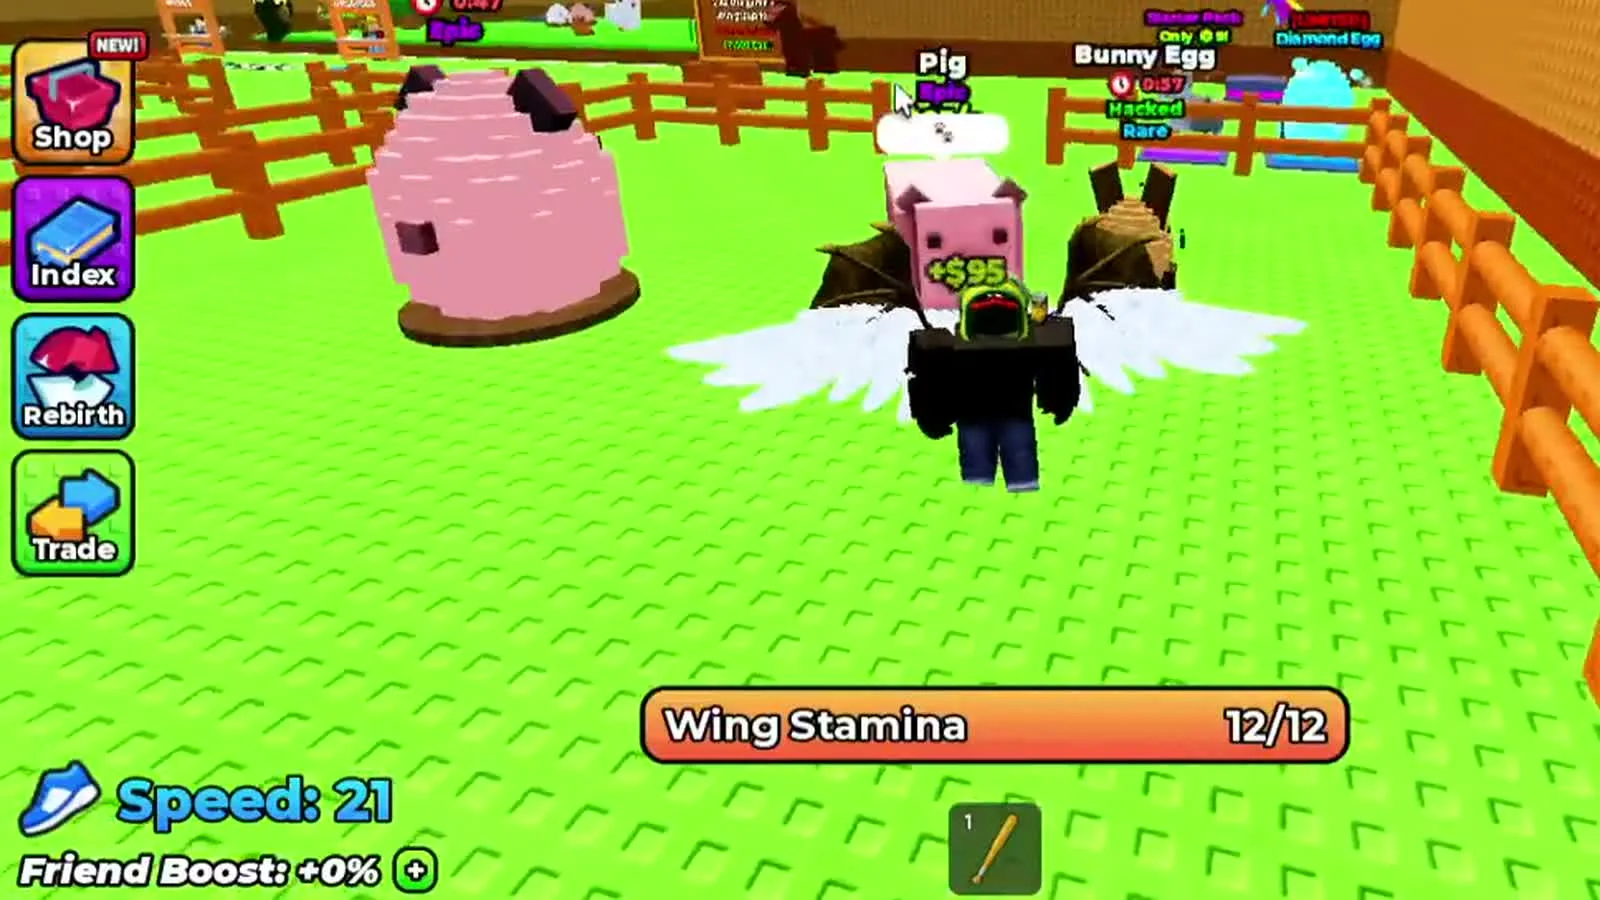 Once the egg is on the plot the hatch timer runs even while you are offline.
The mistake to avoid is the one CHALLS makes on camera: with the egg banked and the bar refilled, he turns around for one more egg, gets caught, and loses the second one. His own conclusion is blunt — “don’t be greedy, just take one egg at a time” (CHALLS, 7:07).
Which Nests Hold the Rarest Eggs
Rare eggs are not spread evenly. The early zones exist to fill your pen, and the value climbs steeply as you head away from the safe zone. The zone order below follows the same progression the videos walk through, from the starter islands to the endgame ocean.
| Zone | What the nests hold | Why you go there |
|---|---|---|
| Forest & Beach | Chicken, pig, brown mouse, bunny | Starter pen filler and first cash trickle |
| Desert | Frog, ladybug, golden variants | First reliable mid-tier income |
| Arctic | Ice Wolf and cold-biome eggs | First genuinely high-value egg on the route |
| Volcano | Dragon and lava-themed eggs | Big payouts, heavy defender pressure |
| Void | Void Lion, Phoenix eggs | Eternal-rarity targets and huge multipliers |
| Cloud Land | High-altitude nests | The bridge between Void and the ocean |
| Deep Ocean | Kraken, Narwhal, Ocean Elephant, Pixel Shark | The best eggs in the game, plus event spawns |
 Value climbs with distance from the safe zone, and so does the cost of a failed landing.
Two things change the value of an egg after it spawns. Rarity tags — Common, Uncommon, Legendary, Mythical and Eternal — set the baseline, and mutations stack on top: a Splash mutation is a random spawn chance that players report at around 15% on any egg (Floppys Pro, 14:05), while Diamond and Cosmic variants appear on specific eggs in the wild. For the complete egg list per zone, use the eggs and areas reference rather than memorising this table.
How Bosses, Lasers and Other Players Interfere
Nothing on the route is passive. The three things that will end a steal run are predictable, which is what makes countering them a learnable skill.
- Laser lines. Overhead beams sweep the space between islands. One hit knocks you out of the sky and the egg drops where you fell, so you have to fly back down into the same hazard to recover it. CHALLS loses an egg to a laser and has to return for it (CHALLS, 3:02); FoltynPlays solves the same hazard by climbing high and staying above the beams (FoltynPlays, 5:40).
- Defenders and bosses. Dragons and large animals sit on the best nests and breathe on anything that lands. On one volcano run a dragon burns the player and the eggs are gone (Floppys Pro, 8:03). Read the defender before grabbing: if it is already looking at the nest, come back after it turns.
- Server events and other players. Lava events, hacking events and night spawns re-roll the best nests and hand out short-timer eggs, and other players are racing for the same nest. Small animals cannot follow you into the air, so flying away is a real escape.
If your resistance is below what a zone asks for, the trip is a coin flip: FoltynPlays reaches a T-Rex nest showing a requirement of 160 resistance while carrying only 155, and dies repeatedly on the attempt (FoltynPlays, 7:10). Increasing resistance is cheaper than replacing eggs.
What You Keep and What You Drop When You Die
Death in this game is expensive in exactly one way, and understanding the split stops you from over-cautious farming.
| Situation | What happens |
|---|---|
| You fall in lava or get hit by a laser | The unhatched egg in your hands is dropped; you respawn at the safe zone |
| Your pen and hatch timers | Keep running and keep earning, online or offline |
| You run out of stamina mid-flight | You drop out of the air and lose the egg unless you can recover it |
| You revive | You return to the route, but the dropped egg is usually gone for good |
| You rebirth | Speed, stamina, cash and your pen animals reset; purchased wings and Index entries stay |
The practical rule is to deposit before you experiment. A banked egg is permanent progress; a held egg is a bet.
A Repeatable Rare-Egg Route
Once the mechanics are familiar, this is the loop worth repeating. It is deliberately conservative: one egg per trip, no heroics, and a deposit before every attempt.
- Top up at the safe zone. Claim the free wing stamina at the Upgrades stand, grab the free group animal from the active codes and rewards list if you have not already, and check the bar before takeoff.
- Run the easy zones first. Bank Forest, Beach and Desert eggs until the pen is full — the passive income buys your carry and stamina upgrades.
- Push one zone deeper. Move to Arctic, then Volcano, keeping the return budget untouched on the way out.
- Rest on platforms on long routes. Land, let the bar refill, then hop to the next island instead of gliding everything at once.
- Climb above the lasers. Fly high over the beam line, then descend onto the nest from above.
- Take one egg home. Deposit it on the plot, wait for the hatch timer, then decide whether the bar and the corridor are safe enough for another run.
- Stage the night grids. When a server event rerolls the deep nests, be already parked near the Void or Deep Ocean ledge so you can reach a short-timer spawn before it disappears.
If your income stalls, the bottleneck is usually carry capacity or offline slots rather than flight skill — the pets and hatching guide explains how pen animals turn each deposit into permanent income, and the rebirth and offline cash guide covers when a reset is worth it.
Source Videos
The mechanics and screenshots on this page come from these gameplay videos. Timestamps link to the exact moment each behaviour is shown.
- VendoPlus — How to Play +1 Wings For Eggs Roblox Full Guide (89 s). Stills for the flight, the Upgrades stand, the wings shop and the plot deposit.
- CHALLS — +1 Wings For Eggs GUIDE! (Codes, NOOB To PRO, Tips & Tricks) ROBLOX (8:00). Carry-limit slowdown, laser recoveries and the greed mistake.
- FoltynPlays — Roblox +1 Wings For Eggs.. (11:04). Resistance requirements, laser dodging and mid-run revives.
- Floppys Pro — NOOB TO PRO Got BEST EGG in +1 Wings For Eggs! (25:23). Zone progression, rest-to-refill routing and mutation spawns.
- 杰克游戏ROBLOX — 飛行偷蛋:別攔著我,我要上天!|+1 Wings For Eggs ROBLOX (10:27). Segmented flight when a nest is just out of stamina range.
Still frames are cropped to remove any overlay that belongs to a channel rather than to the game itself, and every screenshot is used only to illustrate the original text above.
Related Articles
guides
+1 Wings For Eggs All Eggs & Areas: Every Zone in Order
Every area in +1 Wings For Eggs in unlock order, from the Forest and Beach to the Deep Ocean, with the stamina each gap recommends and the eggs it spawns.
guides
How to Get Cash in +1 Wings For Eggs: Upgrade Order
The fastest ways to get cash in +1 Wings For Eggs: per-second pen income, which upgrade to buy first, free rewards and a repeatable egg farming loop.
guides
Best Pets to Farm Cash in +1 Wings For Eggs: Hatch Guide
How hatching works in +1 Wings For Eggs: egg rarity and timers, pen and carry capacity, cash per second for every animal tier, and which pets to keep or sell.
Was this helpful?
Thanks for the feedback!